


There are numerous reasons that people choose to paint the engine of their vehicle. Most people consider painting an engine block when rebuilding the motor. Not only does it create a more attractive appearance, but it also protects the engine from rust and corrosion. You can match the color of your engine to the paint of your vehicle which also needs protected for a customized look as well.
Just imagine your hot rod’s engine block with some high-gloss orange, blue, or red paint. When you pop open that hood, there’s going to be a lot of heads turning. Plus, removing all that grease and sludge helps it to run a little cooler, which is an added bonus.
The best way to paint your engine is to completely disassemble it. Most people find the best way to handling the painting is to remove the engine completely. If you choose to move forward with painting an engine block while the hoses, cylinder heads, intake, and other components are attached, your final product might have overspray on it. Then, you won’t be able to clean it properly and the paint will start to peel. It’s much wiser to invest time into removing everything from the engine block first.
That’s why we’ve put together a complete guide to painting an engine block.
Before You Begin
Prior to starting this work, it’s wise to have the engine looked at by a mechanic if you’ve been having any trouble. This way, the problems get resolved before you put a bunch of time and money into painting it. Find a qualified mechanic that can give the engine the stamp of approval to move forward with the painting.
Step #1 – Drain all Fluids
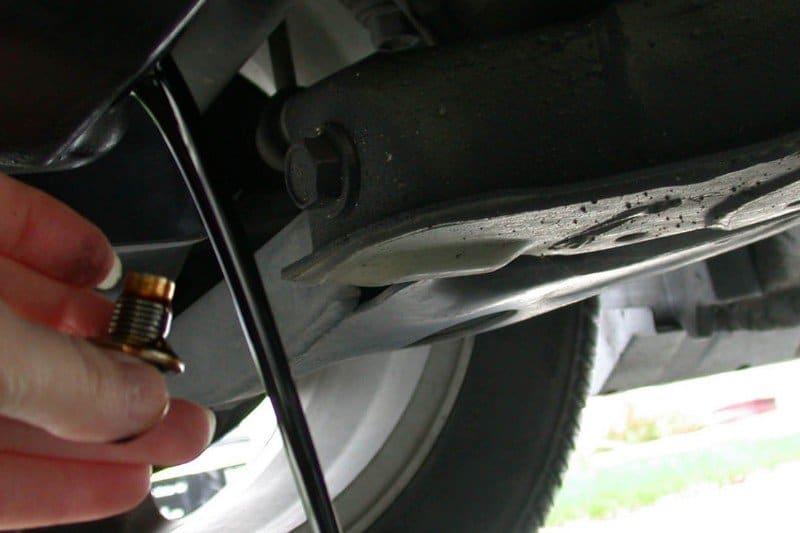

You might also want to try using some compressed air to force the fluids out. This is helpful when you encounter areas where the fluid doesn’t flow out freely. Wipe off the fluids from the engine with a shop rag before moving on.
Step #2 – Disassemble the Engine Block
You knew this was going to be the first step. Unless you don’t care about the quality of your work, you must do this first. You’ll want to remove the water pump, power steering pump, pulleys, and intake manifold. Some people also choose to remove the cylinder heads, timing cover, and all the bolted-on parts. Other components to focus on include an air conditioning compressor, if you have one, and alternator.
You could remove the crankshaft and pistons, but you don’t need to. Some people feel this eliminates the possibility of getting any paint on these internal parts. If you choose not to, the color might flake later and cause some expensive damage.
Step #3 – Make Sure You Label Everything
In the process of removing everything, you’ll need to keep things orderly and organized so you can put it all back together again. Everything that comes off your engine block should be labeled while you disconnect it.
This includes your coil wires, spark plug wires, radiator hoses, fuel lines, heater hoses, and vacuum lines. You can use masking tape to label them. Then, simply bundle them together as best you can. Place the connection ends into a plastic bag and then zip tie them. Make sure you store them out of the way but keep them accessible for when the job is complete.
Step #4 – Mask Off
Once you’ve done this, you’ll want to clean the engine block. This entails water and you know there are lots of areas on your motor you don’t want wet. To keep everything dry, you’ll need to cover these spaces.

If you use a carbureted engine, you want to take off the air cleaner, put some paper towels in the top, and then cover it up with a plastic bag. You can put tape all around the base of the bag to secure it.
If the tape goes over the edge of the block, don’t fold it against the block. Instead, make sure you cut off the excess with a blade. Make sure you cover the bottom of your engine in the same fashion as you did the top.
Before moving on, you’ll want to double check your work. Keep a close eye out for any openings that might be inside your block. If you notice them, promptly follow the above steps to cover them up as well.
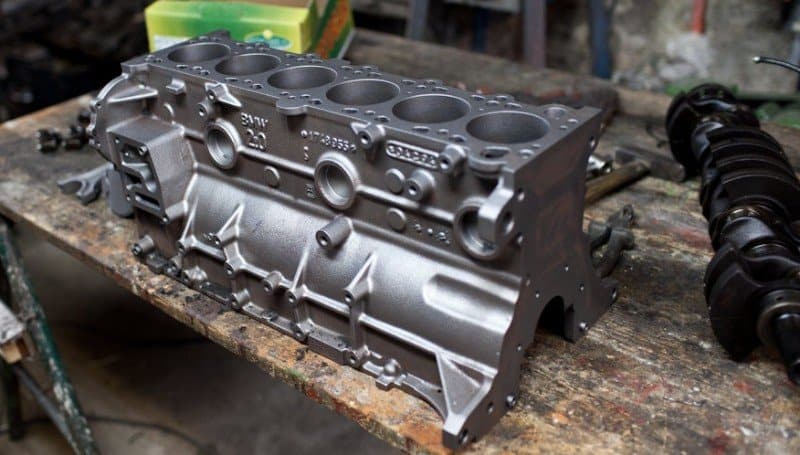
Step #5 – Clean the Engine
Start by scraping any excess dirt or crud off your engine block with a wire bristle brush. You want the engine to be free of all grease, oil, and dirt before painting. Otherwise, the paint isn’t going to adhere and it will chip in the future.
To fully clean the area, you’ll need one of the best engine degreasers on the market. Spray off the engine block with your chosen degreasing agent. Make sure you coat it completely and allow it to soak as per the directions.
Rinse off the degreaser with water. Make sure you spray it off with your pressure washer or garden hose. You might need a good amount of pressure to complete the job.
To remove all the water when you’re done, you can use compressed air. Simply blow off the water until it’s completely dry. If you allow any water to sit on the metal, you could face rust and corrosion. This is especially true with a cast iron engine block.
Once you’re done, inspect the engine for any oil and grease. Make sure you don’t see anything on the exterior surface. If you need to, don’t be afraid to re-apply the degreaser as needed. You could just spot clean in the tough areas until all the dirt is gone.
You may even need to use a small brush to agitate the grease until it comes off. Just remember to rinse and dry completely every time you put more degreaser on.
Step #6 – Use a Sandblaster if Needed

Sandblasting breaks up any rust and loose paint left on your block, so the metal underneath becomes exposed. You’ll know when to stop because there will be nothing left to remove.
Then, mix a bottle of vinegar and water with a one to one ratio. Spray that on the entire engine surface. You’ll probably notice a foaming action occurring and the vinegar while the solution neutralizes everything. While you spray, take extra caution not to saturate your masking taped areas.
When you’re finished, simply use your air compressor to blow off the entire surface. Once it’s completely dry, you are ready to move on.
If you’re noticing rough edges or casting marks that you can’t remove, it’s acceptable to get out your grinder and smooth the surface as well. This creates a uniform surface that the paint can adhere too properly.
Step #7 – Use Paint Thinner
Wet a rag with some paint thinner. Then, wipe down the entire engine block. You could also pour the thinner into a container and use a paintbrush instead.
Paint thinner can hurt rubber and electronic components, but you should have already removed all of it or covered it completely.
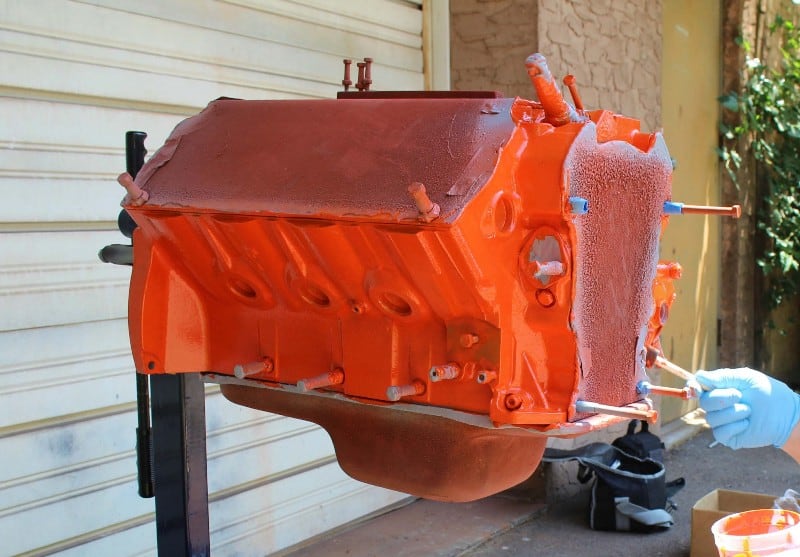
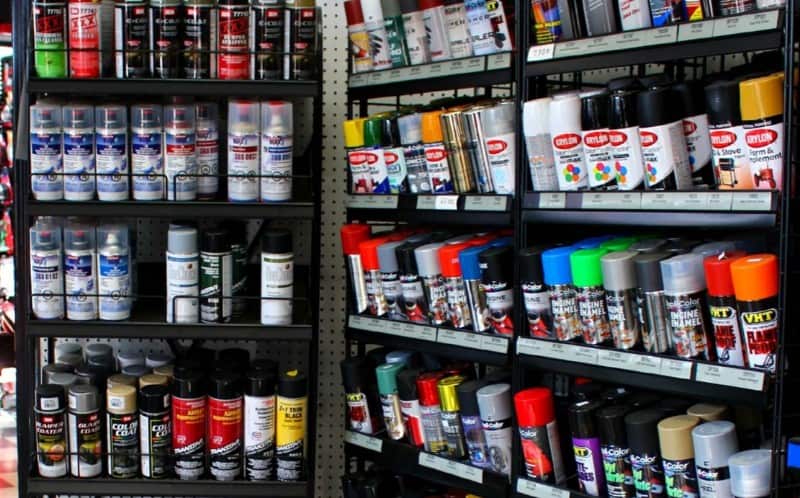
Step #8 – You’re Ready to Paint


Make sure that you purchase a high-temperature engine paint. Otherwise, you won’t get the performance you hoped for. You can opt to match your paint to your car, or create a custom paint job all your own. VHT and Dupicolor provide charts to the OEM engine colors and some other custom choices as well.
Use even and smooth strokes as you spray the paint on your engine block. Release your nozzle every time the can goes past your engine. Most people find that two coats seem to work the best. To do this, ensure that you’ve allowed the first coat to dry until it’s tack. Then, you can move on to the second coating with ease. If you don’t let the first coat dry slightly, you’ll notice runs in the paint. Spray down the block as far as possible, and then spray the bottom of the engine too.
You might need to use your paintbrush to reach some areas that the can couldn’t get. Remember, every bit of detail makes a big difference in how the final project looks. Once you put everything back together, you want to be proud of the job you accomplished, which is why you take the extra time now.
Step #9 – Put the Engine Block Back Together
Once your paint is completely dry, you’re ready to re-install the components you removed earlier. We recommend waiting a minimum of eight hours, but longer is always better.
Wait until the paint is completely dry before re-installing all the components and at least 8 hours before starting your engine. Hopefully, you followed the tips earlier and you simply need to pull out all your labeled parts. If so, then your job shouldn’t be too difficult.
5 Additional Tips for Painting an Engine Block
1 – Don’t just hose off the degreaser and dirt without checking local laws. Some areas make this illegal without the use of a catch basin. Then, you must also dispose of your waste properly.
2 – Store-bought paint enamels don’t require the use of a primer. If you take your time and do the preparation work, you should do fine without this. However, you still have the option to use an entire system that includes engine primer. Many of them also come with prepping sprays as well.
3 – While applying paint, you’ll need to avoid any windy conditions. In addition, humidity plays a role in how the paint adheres and dries. Choose a time of day and location accordingly. Ideally, you’ll want to spray when the temperature reaches between 50 and 80-degrees Fahrenheit.

5 – When the job is complete, don’t toss those spray cans into your regular garbage cans. When these cans are empty, they’re considered toxic waste. Look into the local laws about how to dispose of these properly in your area.
Final Thoughts
Whether you’re painting your engine to protect it from rust, give it a new look, or prepare for that next car show, you’ll be pleased with the results. The job might take a lot of work, but it’s well worth the effort. Sure, you must invest some time, but all good things require your hard work. If you put forth your full attention into the detail work associated with revamping your engine block, you’ll achieve a deep sense of accomplishment when the painting is done. On top of that, your engine will be clean and should stand out in a crowd.

