
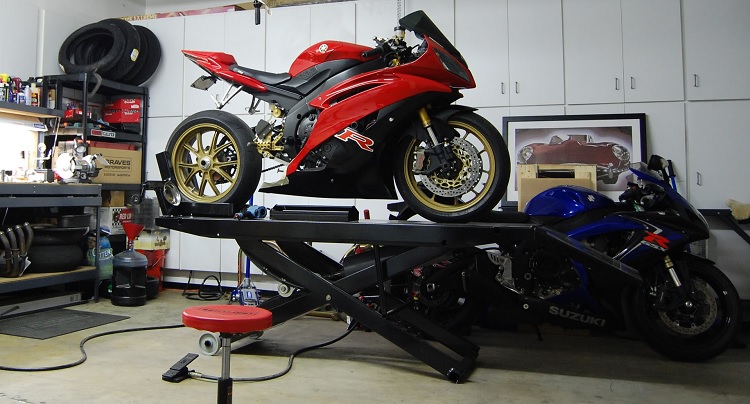
The best motorcycle repair shops are always in high demand and the best mechanics should be focused on real problems (like engine repair and collision repair) rather than wasting their time on little jobs that their customers could have easily done themselves. Here are 10 jobs that you can do at home instead of paying a mechanic for. And in no way are we suggesting that mechanics aren’t worth your money – because they damn well are! However, there are a few easy jobs you can do, doing your overworked mechanic a favor, and giving your over-stressed wallet a rest at the same time.
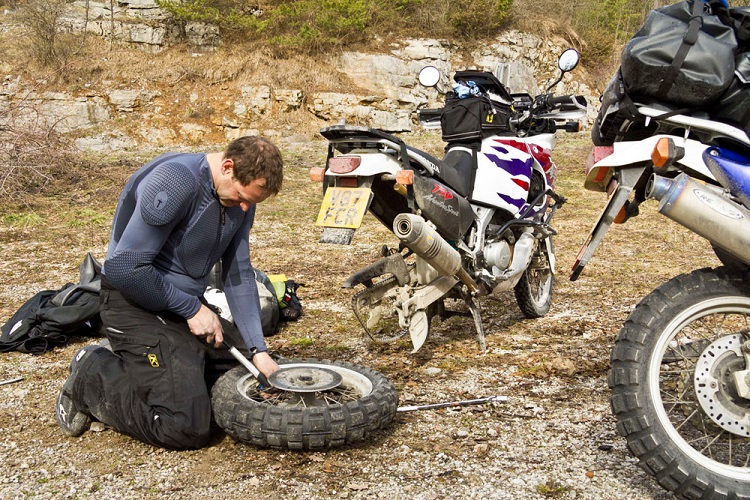
By definition, any self-respecting motorcycle rider should have a basic knowledge of how their bike works and should be able to self-diagnose the vast majority of problems – or at least make a guess that lands roughly in the same ballpark. These basic key skills are really useful: there are going to be times when you’re going to have to repair things by yourself, you might be stranded in the middle of nowhere, or fate might force you to take a stab at a repair job at home with no help, and there will definitely be times when your bike won’t start and you can’t even ride it to a professional motorcycle repair technician – and that’s why having a rough idea of how your bike works and what problems it could have will pay off.
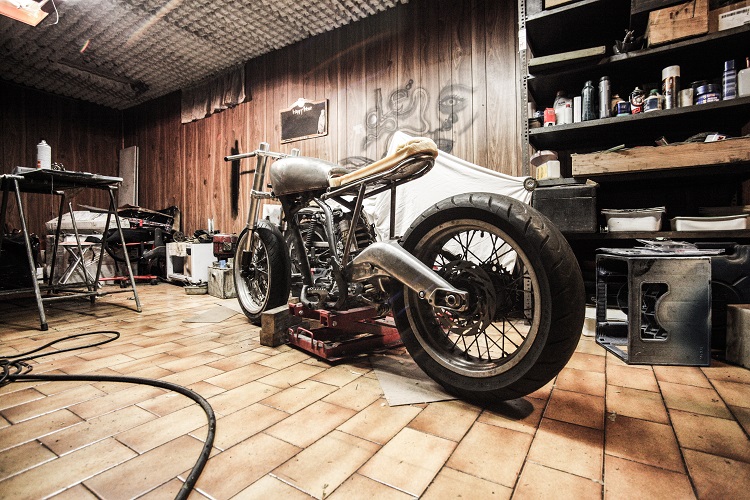
Any mechanic, much like a doctor or dentist, will tell you that prevention is the best defense against major problems. By “prevention” they mean keeping on top of maintenance, storing your motorcycle properly, and replacing whatever consumables need replacing sooner rather than later. It’s mainly the latter that we’re concerning ourselves with here. Before you get started though, there are a few things you’re going to need before tinkering around with your motorcycle.
Good tools go a long, long way. Kit your garage out with good quality basic tools, and half your battle is already won. Poor quality tools cause more problems than they fix, so consider this a warning. Next, you’re going to want a good workshop manual that’s specific to your motorcycle’s model. The correct manual will give you all of the specification details for parts, torque settings, and even walkthrough guides to help you solve even the toughest of problems. A book is only so good though – and we recommend that you ease into the world of mechanics with a more experienced friend standing over your shoulder, with a beer in hand, to tell you why you’re doing something wrong – and offer help should you be in dire need. So, without further ado, let’s look at the jobs that you can do at home!
10 Motorcycle Repair Jobs You Can Do At Home
#10. Check Those Tires

Tire pressures… Having the correct tire pressure is one of the most important maintenance checks, but one that quickly gets forgotten about and completely ignored most of the time. You’re supposed to check your pressures regularly, to the tune of once a week but none of us ever take it that seriously. Checking and adjusting your tire pressures might not be as sexy as an oil change, or as exotic as checking your spark plugs on the spectrum of must repair motorcycle tasks, but you need to do it. This isn’t something a professional mechanic should have to worry about checking, and you should be on top of it yourself. The wrong pressures cause trouble. If the pressure is too low, your handling and braking will be adversely affected due to an unstable tire wall. If the pressure is too high, your over-inflated tire will suffer from a lack of grip, courtesy of a smaller contact patch between the rubber and the road.
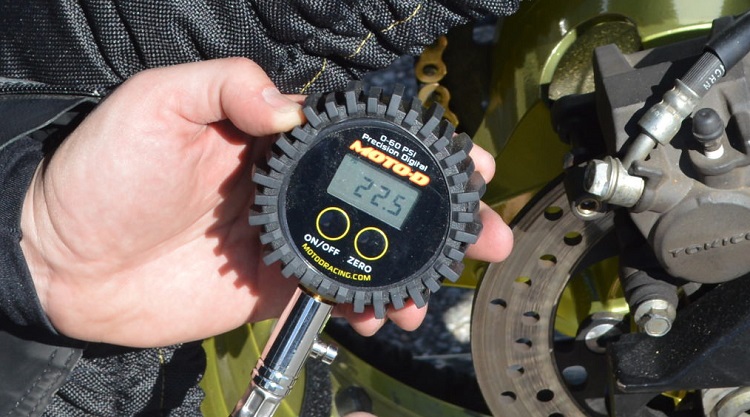
Refer to your owner’s manual for the correct pressures and check them using a quality tire pressure gauge. Adjust the pressure accordingly when the tire is cold, and also consider the weather and whether you regularly ride with a passenger and adjust the pressures accordingly. With your eyes on the tires, check the tread depth and tire condition too. Worn tires are no good for anyone.
#09. Adjust That Chain
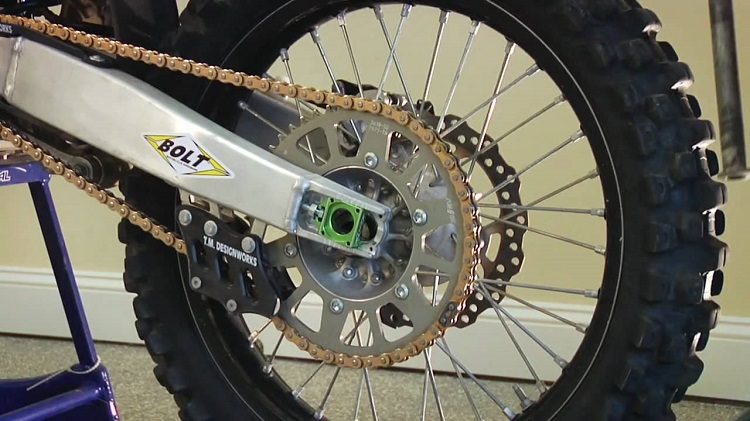
If your chain isn’t properly adjusted you are opening yourself up to whole world of costly motorcycle repairs that could’ve easily been avoided by just keeping a closer eye on things. If that chain isn’t set right, you can expect heavy wear and tear on the sprocket and in the gearbox, rear suspension issues, unnecessary stress on the chain, and a horrible ride experience in general. Besides, nothing screams amateur hour” than a chain that rattles around and hangs lower than a wizard’s sleeve. Chains wear out and break, but with a little TLC you can make that event later rather than sooner.
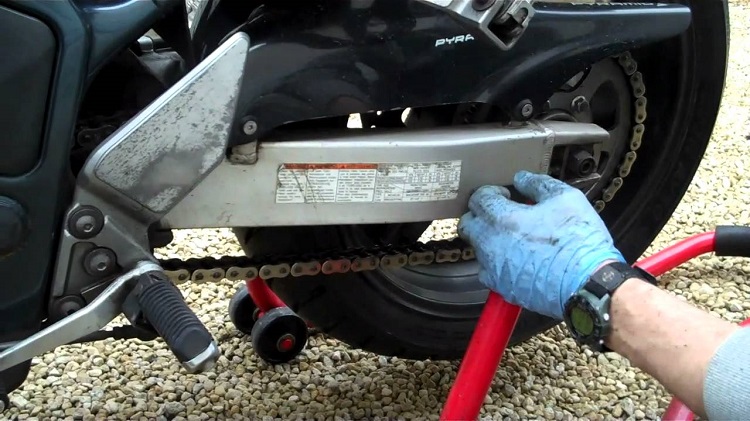
This is what workshop manuals were designed for: to teach you how to perform these little jobs and maintenance tasks. Flip it to the right page for detailed instructions on how to adjust the tension – but be sure to adjust it correctly with either someone sitting on the bike or with a load to simulate your body weight, because that drastically affects things. Also, be sure to use a torque wrench and use the manufacturer’s settings when you’re re-tightening the bolts. A torque wrench is your best friend if you want to keep your bike in tip top health. Lube that chain when you’re done, and you’re good to go.
#08. Replace Your Brake Pads
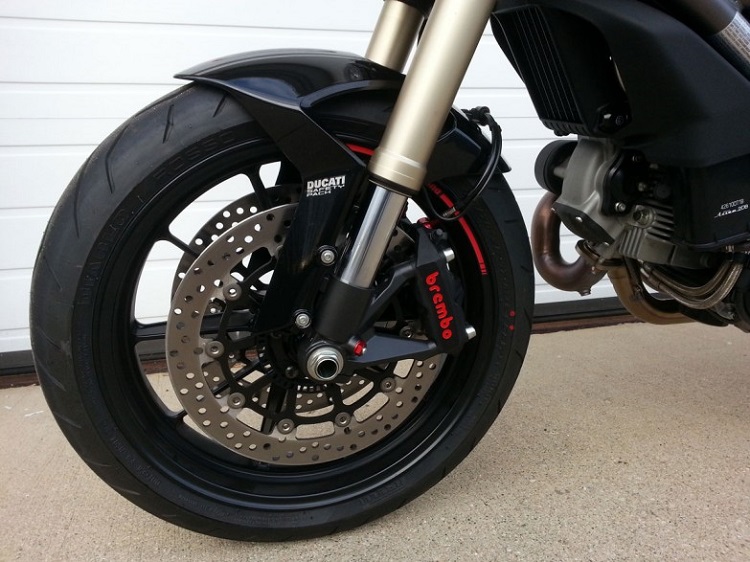
Tire pressures and chain tensions are one thing, but what about your brakes? It might seem daunting because of the nature of it, but replacing your brake pads is a pretty simple task. Simple doesn’t always mean easy though, so call up an experienced friend to keep an eye on you first time round. Screwing your brakes up is quite obviously less than ideal – but don’t let the fear of getting it wrong put you off. Open your shop manual, get your tools and parts together, and call your friend. Motorcycle repair just got serious.

It’s crucial that you’ve got the right parts and that you’re following instructions that are specifically for your bike. Calipers come in a variety of styles with different operating instructions – some allow you to access the pads without taking the whole caliper off, allowing you to get to the pads via a plate on the back and a retaining pin. In that case, push the pistons back into the caliper using opposing jaw needle nose pliers, and replace the pads by removing the old ones and slotting the new ones in place. Replace the retaining pin and plate, and the job is done. Take care with those pliers though, and don’t use them between the piston and disc, or you could do some damage.
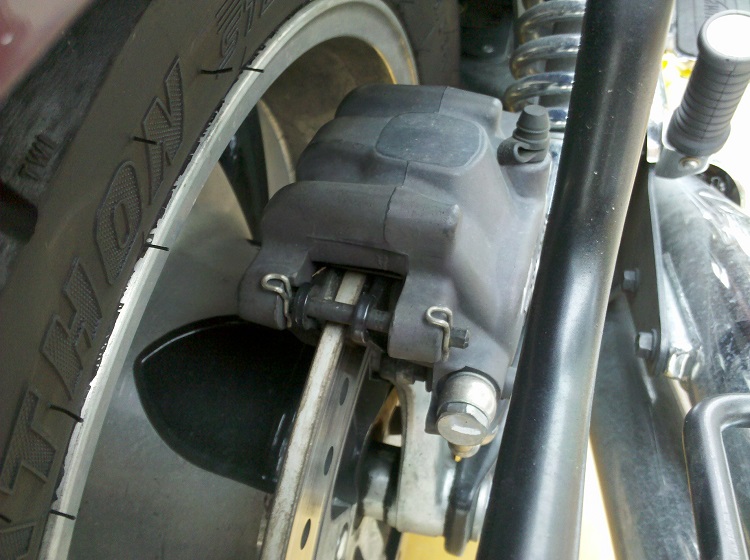
If you’ve got sliding calipers, the task is a little trickier. Remove the entire caliper from the disc and ease apart the caliper’s jaws and remove the retaining clip. Like above, you’ll need to force the pistons back in order to make space for the new pads. Remove and replace like mentioned above, and reassemble the caliper and bolt it back in place using the factory’s recommended torque settings. Give the brake a pump allowing the new pads to settle on the disc – failure to do this last step could result in a bad, bad situation. Don’t follow these instructions though, follow your factory manual. This synopsis just illustrates how simple the task can be. Phew, that’s a decent disclaimer, right?
#07. Maintain That Battery
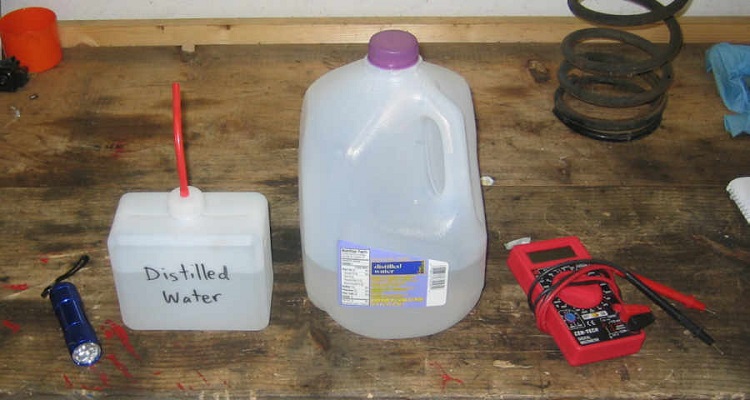
Batteries (and all electrics by relation) are the most frustrating parts of the motorcycle in my opinion, so I like to keep mine in good shape. Depending on where your battery is located, maintaining a healthy battery could be simple or a pain in the ass. Old school bikes like to tuck the battery at the side of the bike behind a side cover, while the vast majority of modern bikes like to hide them away in that annoying recess under the tank or seat, making access more hassle than it should be.
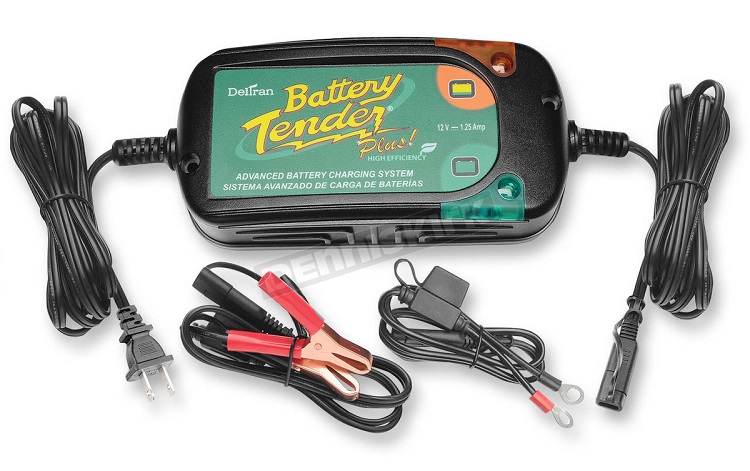
Making regular checks on your battery can help prolong its life: to do this, gain access to it and remove it from its holster. Take care doing this because battery acid isn’t nice. Place it down gently on a level surface and check the acid level – if the level is too low, fill it up with de-ionized water and put it on charge with a proper motorcycle battery charger. If you top it up, take care not to overfill it, or it will drain out while you’re on the road. Modern bikes don’t have accessible batteries, so some of you can skip this. However, giving your terminals a nice greasing can help keep corrosion at bay, so do that regardless, and replace your battery.
#06. Check Your Coolant Levels
If you’ve been overwhelmed with your brakes and battery maintenance, how about something a little easier on the list? Checking your coolant level is one of those classically neglected jobs that should be done regularly and requires very little effort. Check your manual for the location of your motorcycle’s coolant expansion tank: it should be an opaque tank with high and low lines marked on it. If you can’t find what you’re looking for, remove the radiator filler cap and take a reading that way – but make sure the engine is nice and cold if you try that approach. If the levels are fine and in-line with your manual, then all is well. But if not…then it’s time for a coolant change.

Using the manual to find the drain plug, remove it, and get rid of that old coolant. This must be done when the engine is cold. Seriously. With the system fully drained, pop the plug back in place and whip up a new coolant mixture which should be a 50/50 split of de-ionized water and anti-freeze. Fill it to the manual’s recommended level and check your lines and hoses, squeezing them to get any air pockets out. And you’re done.
#05. Assess Your Spark Plug Health

Your spark plugs shouldn’t need changing often but it always helps to keep an eye on them. Your manual should give you a rough idea of when they need replacing, but whipping them out for an assessment is always worth doing. Naturally, the fewer cylinders you have, the quicker this job is – but they’re always worth looking at, because the health of your spark plug can give you early warning signs of more troublesome jobs on the horizon. Fouled plugs can be a sign of poor air and fuel mixtures, worn seals and gaskets, and worse, could indicate that you need a professional engine repair job.
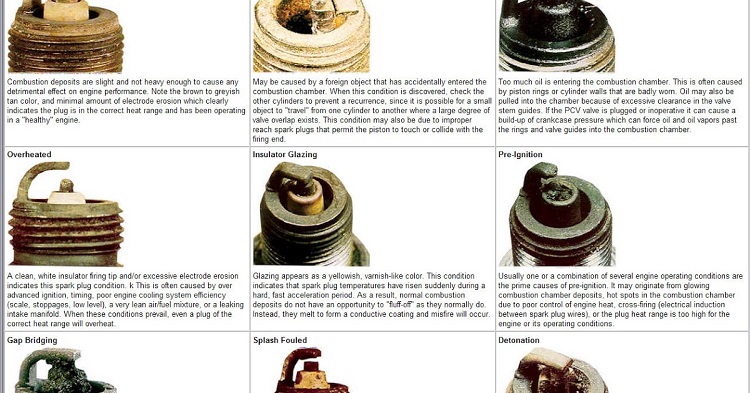
Always remove one plug at a time to keep any lead confusion to the absolute minimum, and check the gap between the electrodes with a set of feeler gauges. Satisfied that everything is fine, place the plug back in carefully, being careful not to over-tighten them. If you need to change your plugs, purchase the correct plugs using your manual’s recommended serial numbers, place them in, and the job is done. This is not a job for a mechanic – unless something has gone drastically wrong with your first attempt.
#04. The All Important Oil Change
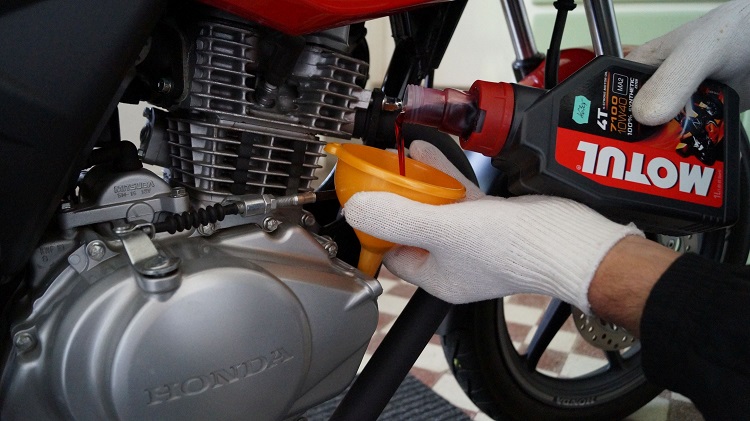
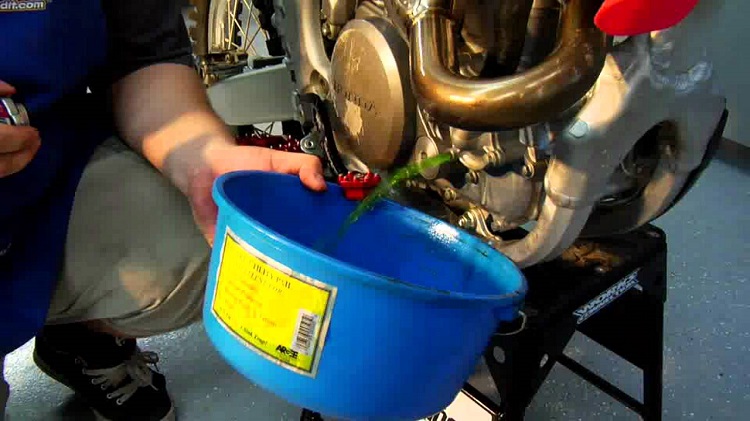
Yeah, you can go to your local mechanic for an oil change but you don’t have to. You can save your money and do it at home with a little bit of know-how. In fact, it’s not much harder than refreshing your coolant. All you need is the right oil, the right tools, and a new filter. Your manual will have all the details but in essence all you’ve got to do is remove the oil filler cap, undo the sump bolt under (or on the side of) the engine, drain the oil into a pan and let it all drain out – ideally while the engine is still warm. Once you’re all drained out, remove that filter.
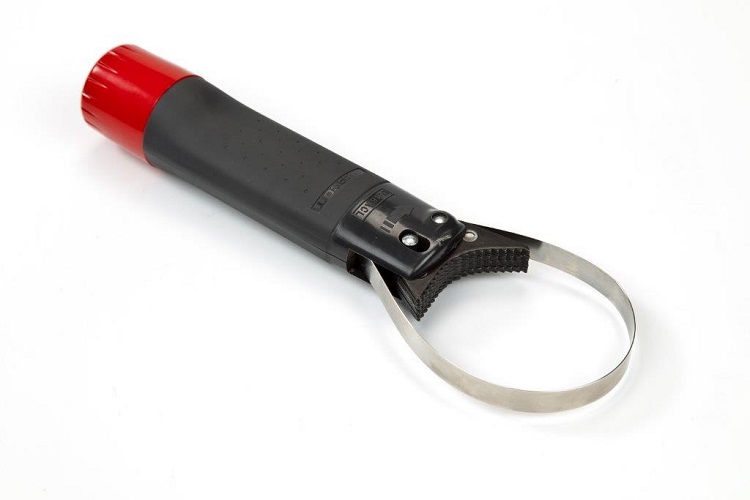
Removing the filter is usually the hardest part of the job, but there is a specific oil filter removal wrench that will save you a lot of time and effort. However, if you do get stuck, the internet is full of cool hacks to help make that thing budge, from using dryer belts, duct tape, and good old fashioned brute strength. Ignore the screwdriver method though – because that can make problems if it doesn’t work. Replace the sump plug and tighten it to the correct torque, and then you can put a new filter in, giving the rubber seal a coating in clean oil before tightening it up in place. After that, fill the engine with fresh oil as per the manual, and let the bike tick over for a minute while you spot for leaks. Kill the engine and let it rest for five, and if the levels are all good afterwards, you’re as good as done. If they’re too high, add more oil. Too low, remove with an oil syringe.
#03. Lubricate Those Cables
Maintaining your cables is pretty easy, and it’s quite a fun job, as it goes. If your cables are feeling a little sticky – because they’re old, or you’ve been riding in the rain a lot, or you’ve been putting them through their paces – then it’s easy to breathe some fresh life into them without having to trouble your mechanic or even buy new ones. For the throttle and clutch (and brake if you prefer your front brake in drum form) you can bring them back to standard by giving them a little oil. All you have to do is work out how to get that oil in between the cable and the sheath. You can either invest in a hydraulic oiler, a clamp style oiler, or try out a cool homemade method shown here in this awesome video.
After you’ve oiled them (using whichever method you see fit) give the cables a proper adjustment and remove any unnecessary slack.
#02. Grease Is The Word!
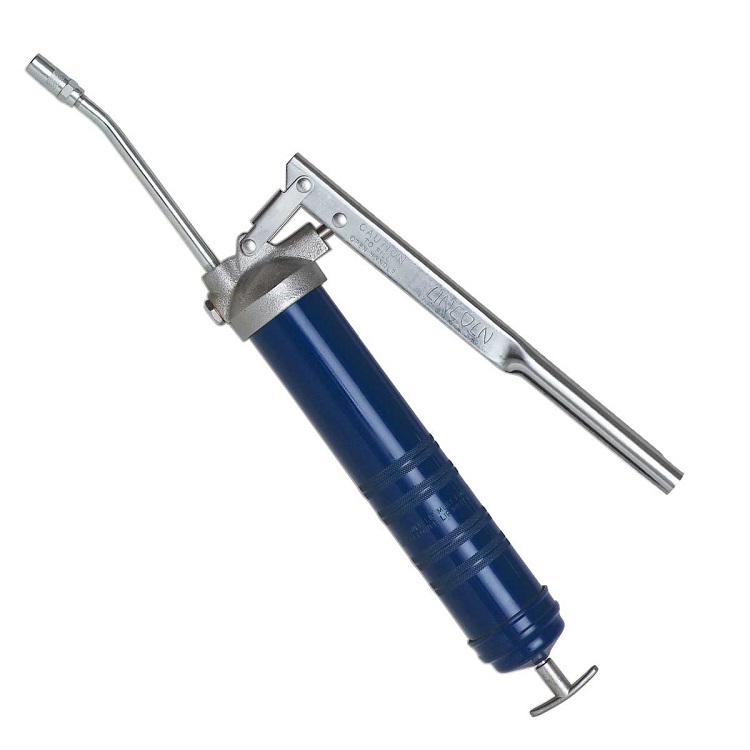
With all of this talk of lubrication, why not lubricate everything that needs lubricating? A bit of grease goes a long way. While we all like to think of our motorcycles as human beings, or toys, or speed demons, they are in fact machines – and machines with moving parts require a bit of lubrication or they seize up and die. We don’t recommend that. And while it’s not strictly a “repair” job, it should be something that you do regularly. Get yourself a grease gun or spray grease, maybe even some copper grease if you’re feeling saucy, and go to town.
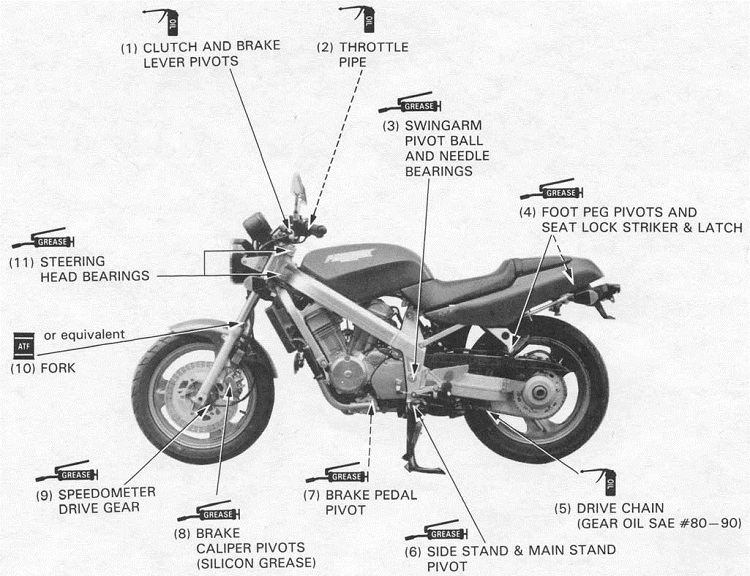
Essentially, you can grease everything including the foot pegs, locks, stands, swingarm, wheel spindle, and most nuts and bolts – all you have to remember is to keep that lube away from the brakes. There are parts of the brake that can benefit from a squirt of copper grease, such as the caliper bolts, but take extra care there. Slippery brakes are a recipe for disaster. If you’re not sure what to grease or even what type of grease to use, check your manual or check with your local dealer for some expert advice.
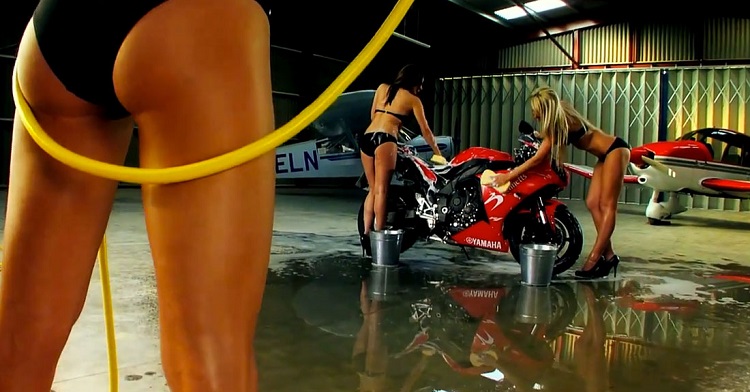
#01. Wash That Bike!

Washing your bike is almost as good as taking it to your local motorcycle repair shop for a full service, but rather than getting a mechanical tune up it gets a cosmetic one. You might not think it but there’s more benefit to giving your bike a wash than simply stroking your ego – in the process you can rid your machine of any corrosive salt that might have stowed away, get rid of any dirt that’s covering up worse problems, and restore your ride to its original factory fresh good looks. You’re also going to be taking a detailed look at every inch of your bike, so if there’s a problem, now is the most likely time to spot it.

Cleaning your bike might sound straightforward but surprisingly there are some people out there who still get it wrong. To start with you need plenty of hot water and proper motorcycle approved shampoo. If you think you can save some money by using dish soap, think again – it can do more harm than good in the long run. Besides, the best motorcycle shampoo products come with good instructions. Usually, they involve a hot water rinse to start, next you apply the cleaner and leave it for a spell to really get to work on that dirt and grime, and only after that do you get the sponge out. It’s generally advised to clean the bodywork and screen first with a nice clean sponge and warm water before moving on to the dirtier and gritty parts. It’s funny how many people get that wrong.
If you’re in the mood, you can treat your bike to some specialist cleaning agents, and give the chain a good clean with a dedicated chain cleaning product, and then give the whole thing a damn good rinse. And that, as they say, is that.